This is test adding a post to see if it goes to the TOC
Categories
This is test adding a post to see if it goes to the TOC
T%he school uses a sponsored account, webtech@pitt.edu, and this sends tickets into the WebHelpDesk and marks them as Website content problem. Like all Pitt acts, the password has to be updated every 180 days.
When this password is updated, it has be ALSO be added to the following
Databases- in this list of databases, the onOpen script holds the acct details:
In the Web Help Desk:
On the web site
This is a new work spec for adding the grad student’s advisor. The data is used in two places on the web site: 1) On the grad student’s profile page, and 2) on the advisor’s profile page, where there is a listing of the grad students they advise.
This data is sometimes provided when grad students are added each Fall. However, the students have up to a year to select an advisor. So, this data may have to be added at that time. The process is that Lori Altenbaugh receives a paper from the student that is signed by Maggie and Sam. She scans this into her system, and then emails the scan to the student. She is adding to her work spec to send the scan also to me via webtech@pitt.edu. This will generate a ticket, and when I receive, I’ll add that data to the student’s profile record in the PharmSchool DB.
This work spec describes the steps Thomas Waters takes when there is a leave of absence or the reverse, or some other status change for PharmD students.
Trigger: Email from the registrar regarding a student.
remove/return student from the class email list.
At some point this will be the registrar’s responsibility- go into the student record, and set status to Leave of Absence. Remove any data from the class year field. or the reverse of these steps.
When a student goes on leave, there isn’t a need to do anything to the PittForms Reporting DB’s, but there is when they return. When they return, coordinate with Matt that the student is added to the correct class Qualtrics survey. If that DB is similar to the class they were coming from, the data can be moved over from the old reporting database (post rx2021), or the student can be instructed to pull a report from the old DB as well as their new PittForms are in the new.
Trigger: Graduation each year
Graduate students get removed from the school’s PharmSchool DB and email distribution lists when one of two things happen. Either Lori Altenbaugh emails me and tells me they have fully graduated, or they are listed in the graduation program.
Steps:
Trigger: Students from time to time take leaves of absence or there are other reasons why data in RxStudent DB needs to be changed or deleted. Other places impacted by this data change would include: email distribution lists, Pittforms Qualtrix survey student lists (dropdown menu where students select their names)m class rosters, and group lists.
Trigger: Susan Meyer provides a PDF of the correct data to Thomas Waters. This generally happens part way through the Fall semester each year.
Steps:
The School is utilizing a tool called Agora Pulse for monitoring and posting to Social Media. These are the steps for using Agora Pulse.
If you will be a backup or regular user, it will be useful to watch the AgoraPulse help videos to learn to make the most out of this tool. This work spec isn’t designed to teach you how to use the tool, but rather the steps to do daily, and an overview of how.
Trigger: This workspace is followed each morning.
There are two work specs for Social Media that should be used in unison. The one your looking at are steps specifically to monitor and post. The other are details and specs for social media including photo dimensions, hashtags and other general info.
To use AgoraPulse, you have to be invited onto “the team” Ask Thomas Waters to invite you.
Open the AgoraPulse WebApp: https://app.agorapulse.com
Select the platform on the left that you are going to monitor. It will default to “To Review” Do all of these platforms: First, look at the items in the inBox. The “inBox” list all of those posts on our pages.
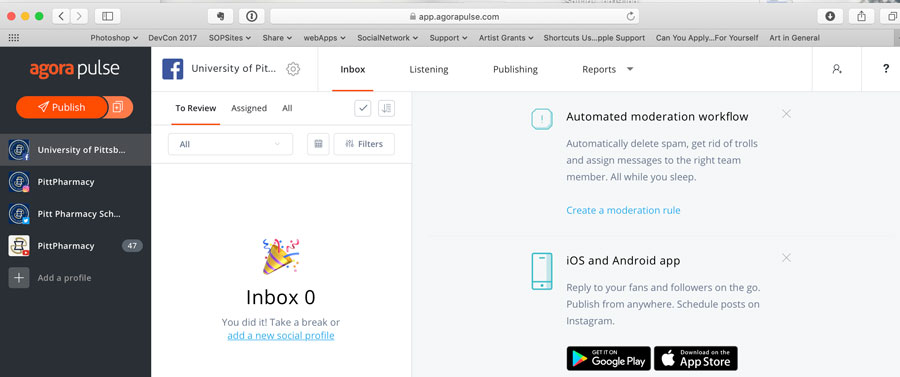
Review each item in the inbox. If it seems bad, hide it. Otherwise, “Like it” “Review it” and you can also comment/engage with it.
Do the same, for anything that is in the “Listening” tab
The “Listen” tab lists posts that fit keywords that the site is set to follow, such as “pharmacy” or that use hashtags we are following such as #PittPharmacy
First, here are the steps for how to post. Further on, I’ll discuss if you should “Publish Now” or “Schedule.” At this time, post ONLY to Facebook and Twitter. Ignore posting to Instagram. Posting to the LinkedIn group is separate and detailed at the bottom.
Note 3/5/2019: regarding WHEN to publish (Publish NOW or Schedule). We may want to make a change to our current work flow and use the AgoraPulse algorithm to assist in planning the best time to have something published. Don’t know for sure- this needs more discussion. Here is a instruction sheet about it. https://support.agorapulse.com/article/show/418-recommendations-best-day-time-and-content-format-to-post
Note added 3/5/2019- At this time, we are not posting to Instagram directly. However, if we have something we wan to go to IG, we will reach out via email to Esther or other student IG poster, and ask, if they want it, want us to post or some other choice.This will be a part of the process we are working to improve and make the most efficient and useful.
Click the big red/orange “Publish” button, but not the lighter orange “+” that you see in the picture above.
First, pick the platforms you are publishing to. At this time, select only Facebook and Twitter.
Next, you “write” the basic post on the left or middle section. You can then customize it for each platform separately.
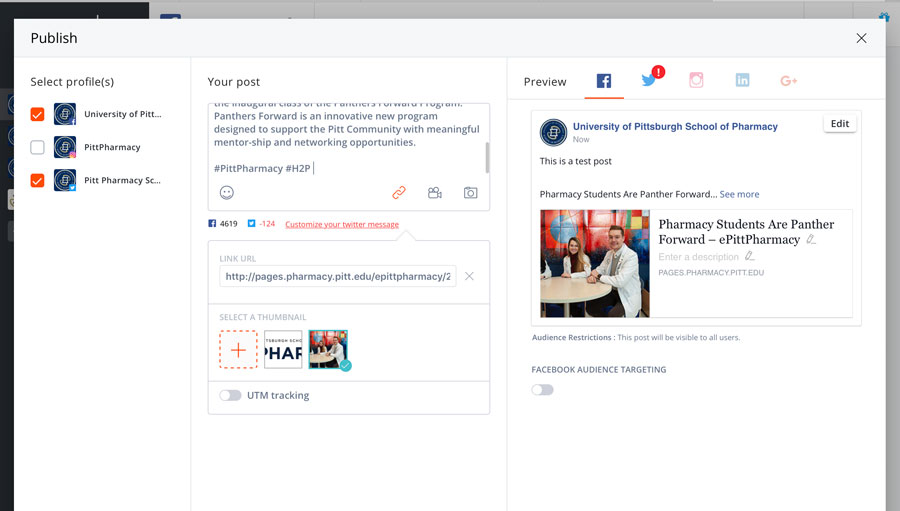
The body of the post has four sections:
Body, hashtags, link, image
Add the body, then a carriage return to make a space, then the hashtags
click the “link” icon to add the URL
Then select the correct thumbnail image
The section on the right hand side is the customization for the platform. It opens by default showing the Facebook custom box. it will look as it does, unless you want to make any change. Use the “Edit” button to add a change that is for that platform only. Note in the above example the text is too long for Twitter, so a red exclamation point is show on the Twitter tab.
Note: AFTER you publish, some things can not be changed. Twitter cannot be changed. Parts of a Facebook post cannot be changed. Instagram cannot be changed. It is essential to use the preview here, and make sure it is EXACTLY what you want.
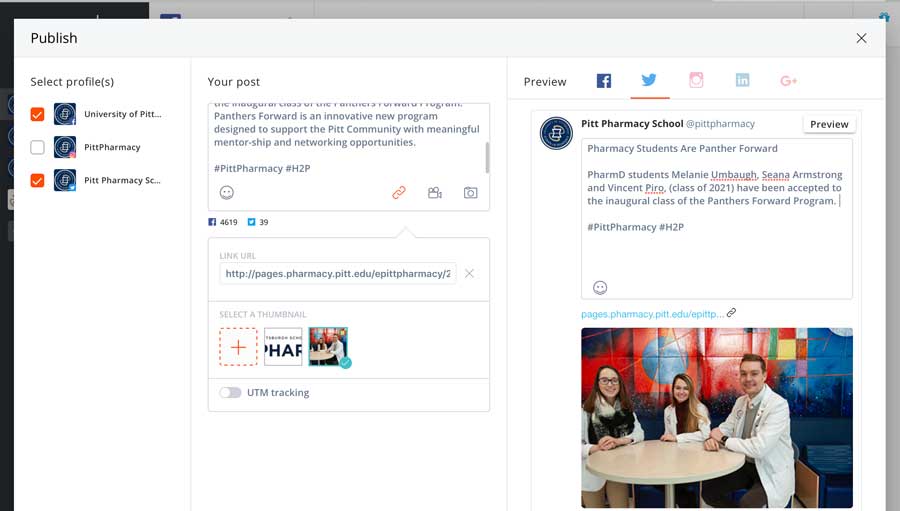
Once you have previewed the post for both Facebook and Twitter, use the radio button next to “Publish” and then click “Next.”
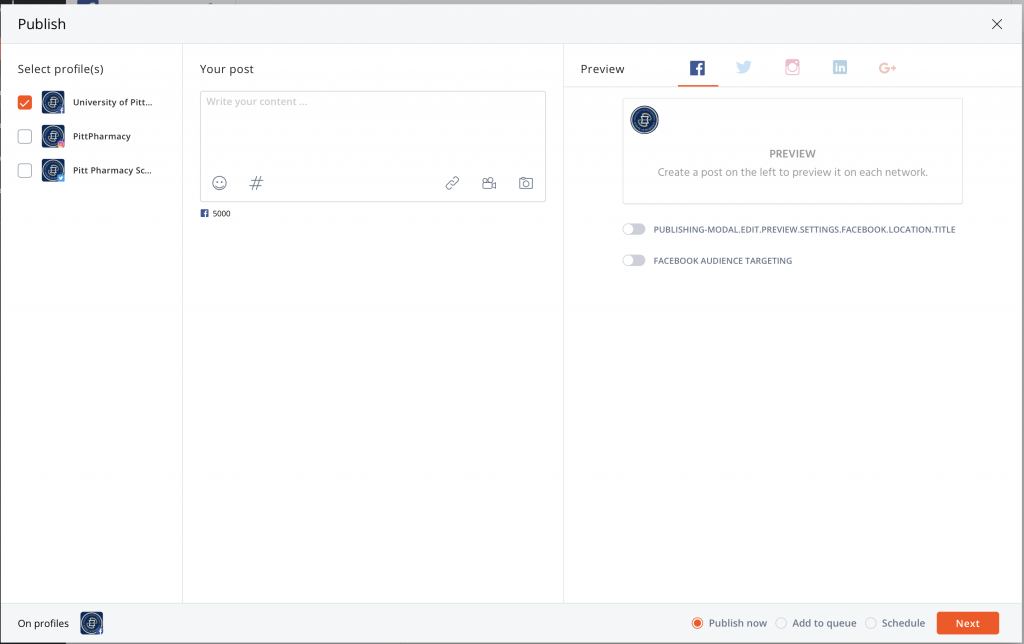
On the next screen, select “Publish once.:” This is our default. There may be reasons in the future to select a different option here. Then click the orange “Publish in the bottom right hand corner.
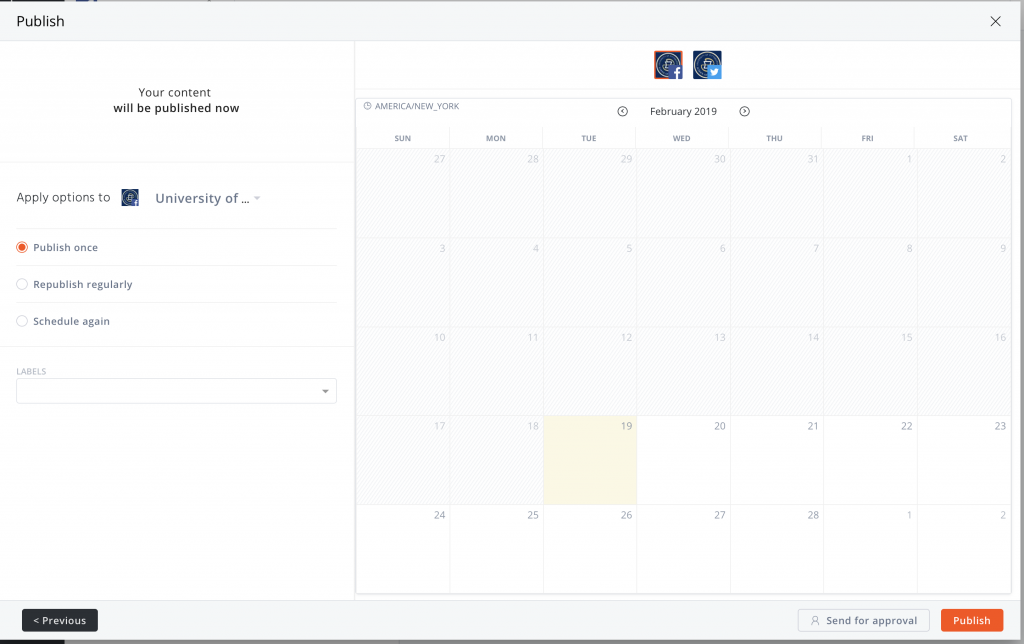
Check the various social media platforms to make sure they have been published.
There is a list of suggested hashtags on this work spec that is applicable to the posting process.
Here are the steps to post to the School’s LinkedIn group.
Description: This work spec describes how to add files, such as photos to the media library for posts. It should work multiple ways, but for some reason, it works some ways, but not others. Once this problem has been resolved, this work flow for adding files will not be needed.
I DO NOT have upload success if I (media Library):
Select Media from the left hand column
I cannot drag and drop image successfully
I cannot use the “Add New” button to upload the image successfully
I DO NOT have upload success if I (Post):
Select “Add New Post”
Add Image Block
Choose the “upload” button
I receive the error: “The response is not a valid JSON response)
I DO NOT have upload success if I (Post):
Select “Add New Post”
Add Image Block
Drag and drop an image onto the block
I receive the error: “The response is not a valid JSON response)